
WE'RE BACK! AN UPDATE FROM BA
Oct 26, 2016

So...it's been a little bit and we have been crazy busy! If you've been following us on social media then you know we lost the matriarch of our family, my grandmother, on January 21st and that sent us all in to a sort of tailspin. It was completely unexpected. She was not sick and she had just had a checkup the very day she died and everything was all good. Except it wasn't.

I think she was just tired and ready to see my grandfather who passed in 2009. Either way, it sucked then and still sucks now. It's hard to not be able to pick up the phone and call her or hop in the car to go see her. The house that they shared is no longer theirs - it sold quickly - and it was devastating to see happen. But, life will always go on, whether we want it to or not. Granddaddy once told me that everything in life is a choice. Even the things that you think you have no control over, you still have a choice - and that is how you will react to it and then what actions you will take afterwards. I hope that my choices will honor them and their memory.

About four months later, after mom did the things she needed to do for the estate, we packed up all of our stuff and headed north to Missouri where my Aunt + Uncle (and several cousins) live - and the house hunt began. For nearly 6 months we went all over the state and even in to Kansas looking for the "right" house. I was worried we would never find it and have to settle for something that was available and ok.

Then we found this beauty in a little town about one and a half hours away from my Aunt + Uncle and we just knew it was perfect. Well, it's perfectly imperfect and I just love it!
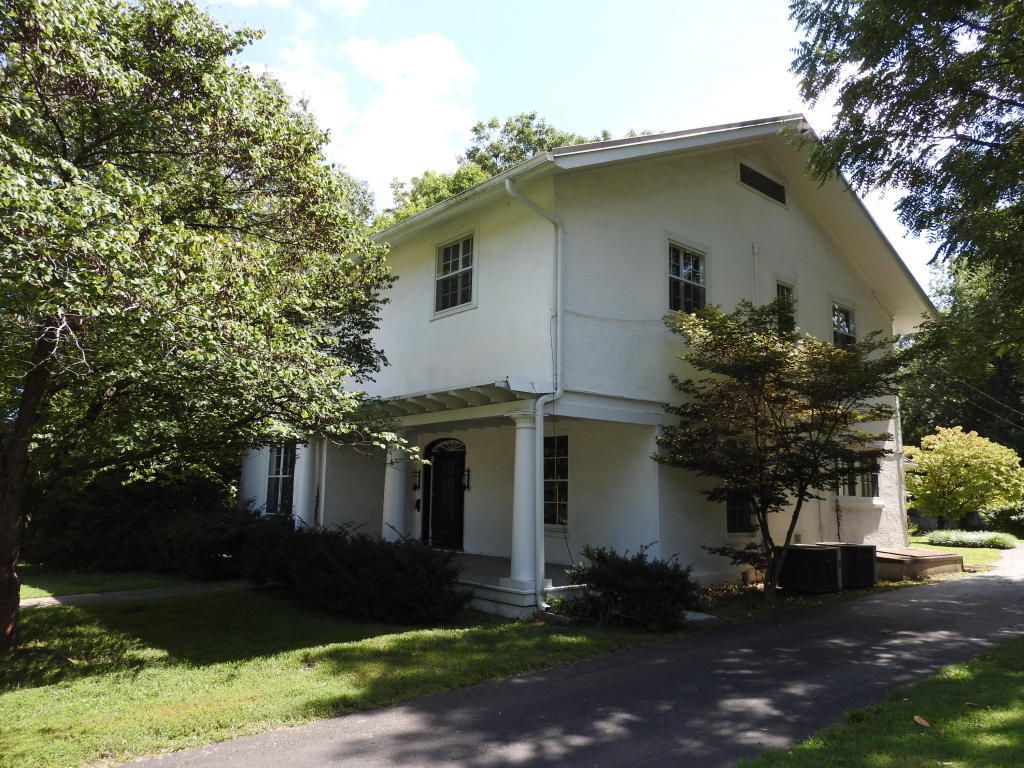
It was built in the 1920's and has such amazing character - hardwood floors, large rooms, super tacky wallpaper, and two fireplaces, just to name a few.

Honestly, I can't wait until the spring so we can get to work on painting, adding trims, and doing a yard redo. It will be awesome to put our own stamp on the house and add to the extensive history that we are now a part of as the new owners of this awesome home.
I really wish grandmom and granddaddy could see this house. I know they would both think it's great!
What do you think? What is your favorite style or era of home?
Credits // Author and Photography: Kate Mark for Bambino Amore // Wedding Photos part of our family collection
GEEKY + TRADITIONAL BABY FRIENDLY FABRIC COMBOS
Sep 2, 2016

As some of you may know, I used to have an Etsy shop where I created little kids clothing and I have been yearning to create some clothes. The perfect opportunity arose when my beautiful niece needed some clothes for her trip to Universal Studios + Florida.
Mom chose to go the more traditional route and create the gorgeous set you see above - using nothing but fat quarters! Can you believe that? Check out those fabric combos - little Lia's nursery has these very color combos. The yellows, soft greys, and crisp white all create a cute + soothing color scheme (or so I'm told!).

I, on the other hand chose to let my geek flag fly and created her two drop waist skirts with a totes adorbs Harry Potter Quidditch theme fabric coupled with a yellow polka dot fabric for one and a blue stars fabric coupled with bright red and + yellow trim on the second one.

I then took basic onesies and added a bit of pizazz to them. The Harry Potter one was created using a Snitch graphic and the HP with the lightening bolt. I took those graphics and loaded them in to my Cricuit machine and made iron-on appliques with glitter vinyl. It really ended up looking great!
For the Wonder Woman outfit, I just added a store bought iron-on applique + then top stitched it for added durability.

So what do you think about these fabric combos? Would you like to see a tutorial for the skirts? Perhaps one for the snitch applique? Let us know in the comments section below.
Credits // Author and Photography: Kate Mark for Bambino Amore
5 EASY STEPS TO ANGLED APRON TIES
Aug 21, 2016

APRON TIES - ANGLE THEM LIKE A PRO
Have you ever wondered how we get those angled ties for our Bambino Amore aprons? It's wicked easy and I'll show you how it's done. So, let's get to it with this quick sewing tip.
STEP ONE:
First, you need to stitch up your ties - according to whatever pattern/tutorial instructions you are working with. This example is of the Lola apron tutorial, which will be coming to the blog in its entirety for free soon.
STEP TWO:
Now you will need to angle the edges - following the instructions on your pattern/tutorial. If you'd like it to look like this one - you need to measure over 1" on the top and .5" on the bottom, draw a line, and then use that line as your stitch line.This is a wicked important step since it will determine how the end of the tie will look. Some are curved, some are squared, and some are angled - ours are angled. Regardless of your desired edge, be sure to back-stitch a bunch because you want those pressure points to be really durable.

STEP THREE:
The next step is clipping along the seams to get rid of some of that bulk - that's the real secret to a nice angled edge.
STEP FOUR:
Turn baby, turn. I use a full on knitting needle to turn my ties. Mom uses a crochet hook. Once upon a time, I used a safety pin to pull the fabric through. There are even some people who use a special tool. Whichever method is easiest for you is what you should go with - just make sure that you turn the tie and push the point out without pushing through the fabric itself (ie., poking a hole in the fabric + totally ruining the tie).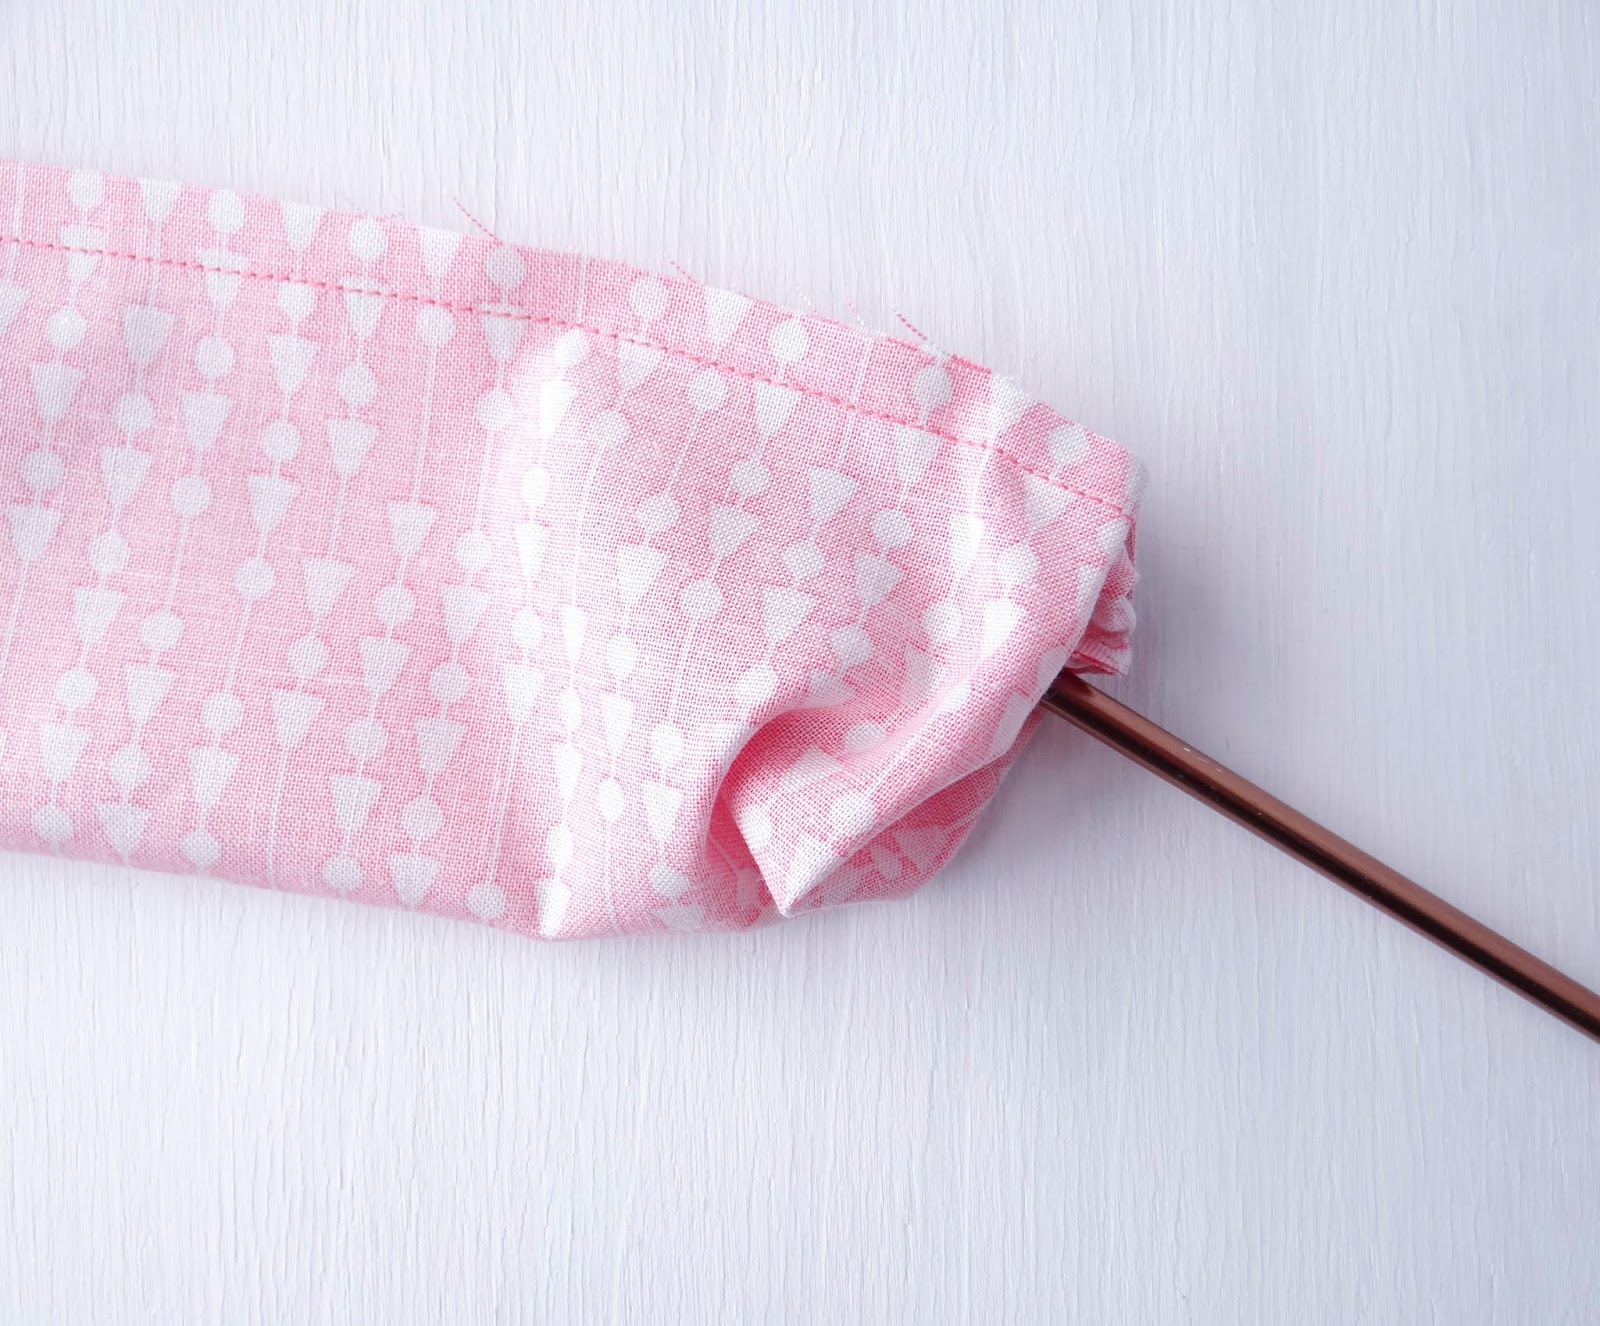

STEP FIVE:
Now you just need to smooth out (flatten) your seam. I do this first using my fingers by rolling the seam and smoothing them with my nails - and then with the iron + starch. That will get them nice and flat.
NUTSHELL RECAP: 5 EASY STEPS TO ANGLED APRON TIES
- Stitch up your ties (lengthwise) according to your pattern/tutorial instructions
- Angle your ties by measuring over 1" on the top and .5" on the bottom, draw a line, and then use that line as your stitch line - making sure to backstitch.
- Clip excess fabric along stitch lines.
- Turn tie + push out point carefully
- Flatten/smooth out seam + press flat
Credits // Author and Photography: Kate Mark for Bambino Amore // Apron Pattern + Tutorial by Bambino Amore
SUPER-EASY HARRY POTTER BUTTERBEER
Aug 20, 2016

In honor of the new J.K.Rowling book, Harry Potter and the Cursed Child, I decided to try my hand at making a Hogwarts favorite. Yep, that means butterbeer baby!
Since I had never had butterbeer before I made this recipe, I wasn't sure what to expect. I had an idea. And I knew what I wanted. I wanted a warm drink that I could make instead of coffee since I really don't like the taste of coffee that much, but, I do like a little coffee flavored vanilla creamer hot drink from time to time. Or hot cooca. Whatever.

And yes, it does taste better with some golden snitches (AKA Ferrero Rochers) to snack on while you sip it. Grab your apron and let's whip up a batch.

You'll need:
- 1 Liter of Cream Soda (your choice of brand - it doesn't matter)
- 3 tbsp. of butter
- 3 tbsp. of brown sugar
- 1 cup of heavy whipping cream
- 5 Werther's Originals candies
Steps:
- In your pot, boil the cream soda
- Combine the butter + brown sugar in a microwave-safe bowl and melt the combo until the sugar has dissolved. I did mine in 30 second intervals so that it wouldn't turn in to a hot bubbly mess - stirring with a fork


- When your cream soda is completely boiling (like, really boiling, not little bubbles) mix in your butter + sugar combo with a whisk - being sure to keep stirring
- Mix in the whipping cream while still stirring
- Toss in the Werther's candies - and you guessed it, keep stirring

- Stir, stir, stir until the candies are all melted.

When the butterbeer has cooled enough to be tolerable, pour it in to a fancy (or not-so fancy - your choice) mug and curl up with a good Harry Potter book, a blanket that shows your house colors, and a handful of golden snitches.

In another post I will show you how to turn this nice warm drink (perfect for fall + winter) in to an iced latte alternative. Yummy...
Have you tried a Butterbeer recipe that was share-worthy awesome? Let us know!
Credits // Author and Photography: Kate Mark for Bambino Amore // Apron by Bambino Amore - found at Bambino Amore

Subscribe to:
Posts (Atom)



Social Icons