5 EASY STEPS TO ANGLED APRON TIES
Aug 21, 2016

APRON TIES - ANGLE THEM LIKE A PRO
Have you ever wondered how we get those angled ties for our Bambino Amore aprons? It's wicked easy and I'll show you how it's done. So, let's get to it with this quick sewing tip.
STEP ONE:
First, you need to stitch up your ties - according to whatever pattern/tutorial instructions you are working with. This example is of the Lola apron tutorial, which will be coming to the blog in its entirety for free soon.
STEP TWO:
Now you will need to angle the edges - following the instructions on your pattern/tutorial. If you'd like it to look like this one - you need to measure over 1" on the top and .5" on the bottom, draw a line, and then use that line as your stitch line.This is a wicked important step since it will determine how the end of the tie will look. Some are curved, some are squared, and some are angled - ours are angled. Regardless of your desired edge, be sure to back-stitch a bunch because you want those pressure points to be really durable.

STEP THREE:
The next step is clipping along the seams to get rid of some of that bulk - that's the real secret to a nice angled edge.
STEP FOUR:
Turn baby, turn. I use a full on knitting needle to turn my ties. Mom uses a crochet hook. Once upon a time, I used a safety pin to pull the fabric through. There are even some people who use a special tool. Whichever method is easiest for you is what you should go with - just make sure that you turn the tie and push the point out without pushing through the fabric itself (ie., poking a hole in the fabric + totally ruining the tie).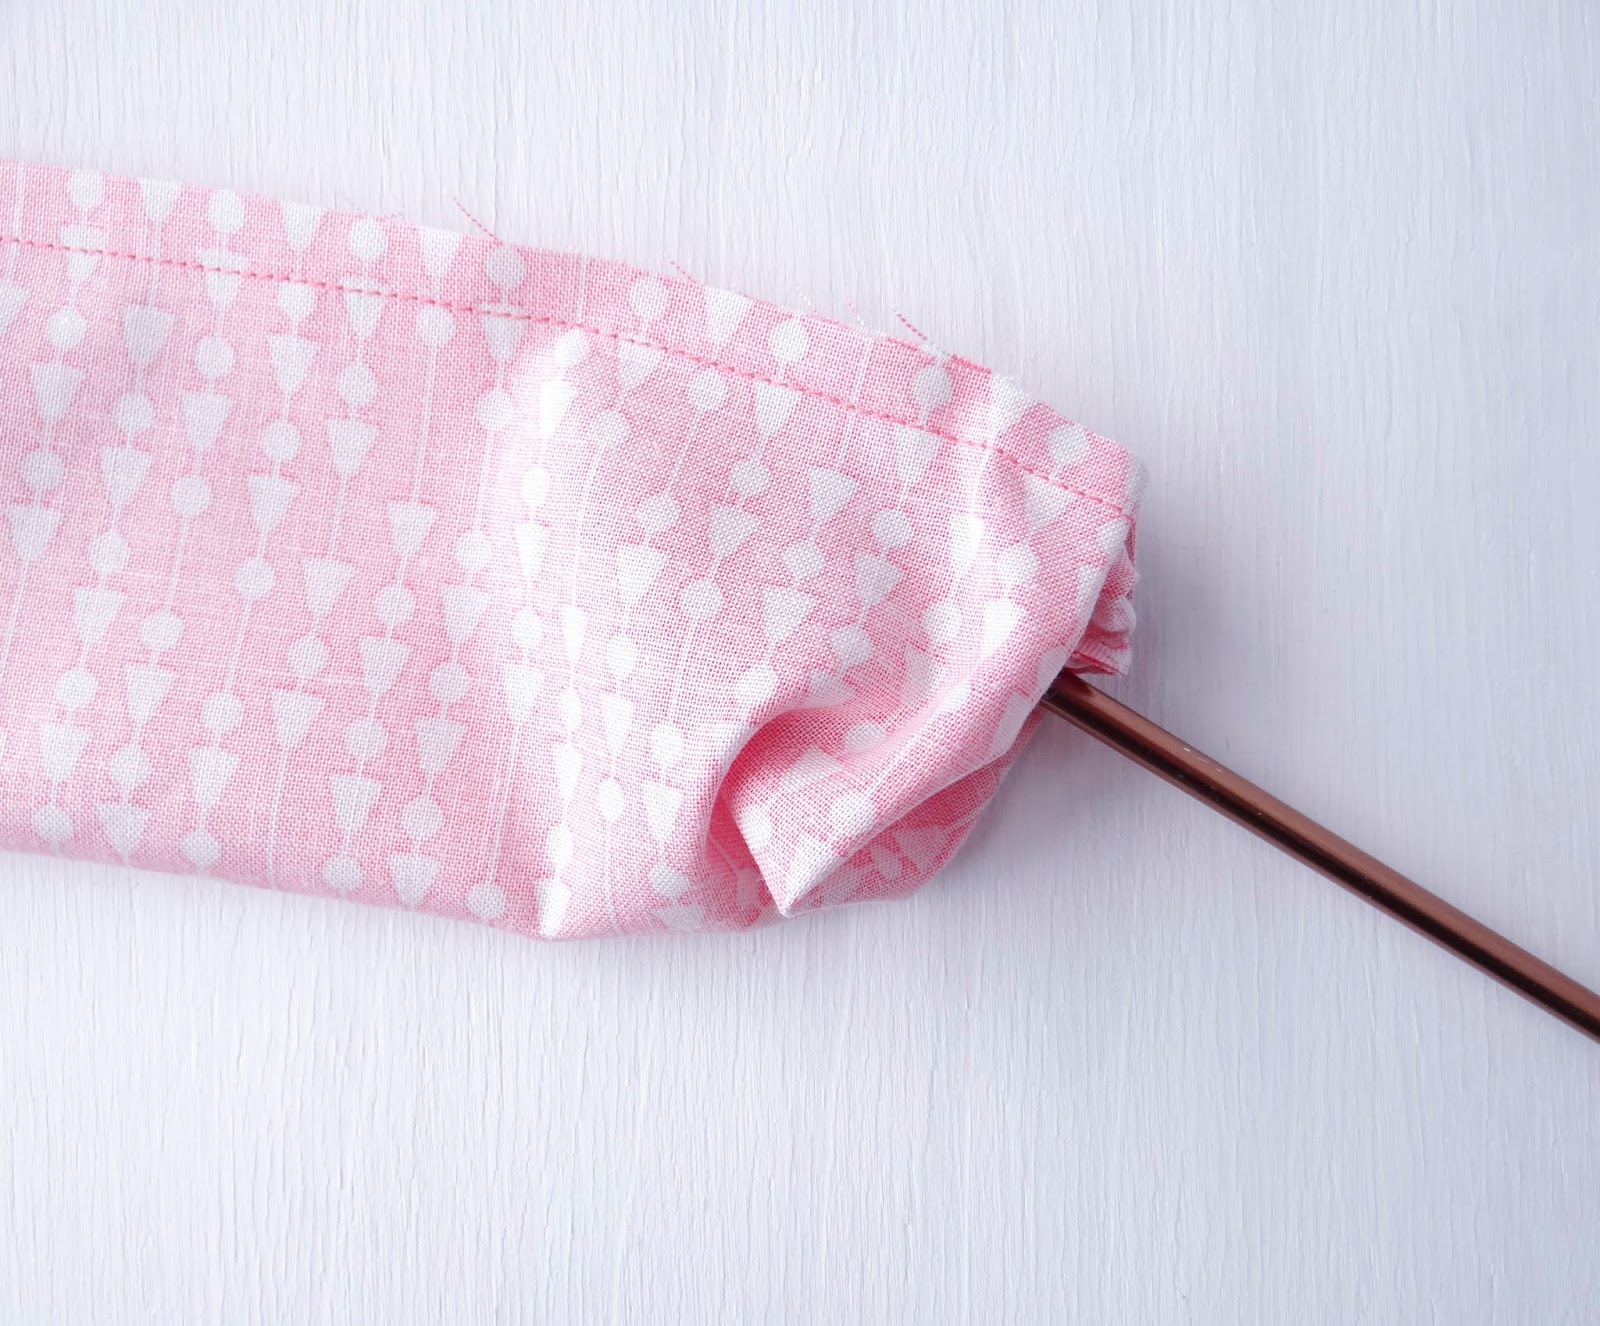

STEP FIVE:
Now you just need to smooth out (flatten) your seam. I do this first using my fingers by rolling the seam and smoothing them with my nails - and then with the iron + starch. That will get them nice and flat.
NUTSHELL RECAP: 5 EASY STEPS TO ANGLED APRON TIES
- Stitch up your ties (lengthwise) according to your pattern/tutorial instructions
- Angle your ties by measuring over 1" on the top and .5" on the bottom, draw a line, and then use that line as your stitch line - making sure to backstitch.
- Clip excess fabric along stitch lines.
- Turn tie + push out point carefully
- Flatten/smooth out seam + press flat
Credits // Author and Photography: Kate Mark for Bambino Amore // Apron Pattern + Tutorial by Bambino Amore
SUPER-EASY HARRY POTTER BUTTERBEER
Aug 20, 2016

In honor of the new J.K.Rowling book, Harry Potter and the Cursed Child, I decided to try my hand at making a Hogwarts favorite. Yep, that means butterbeer baby!
Since I had never had butterbeer before I made this recipe, I wasn't sure what to expect. I had an idea. And I knew what I wanted. I wanted a warm drink that I could make instead of coffee since I really don't like the taste of coffee that much, but, I do like a little coffee flavored vanilla creamer hot drink from time to time. Or hot cooca. Whatever.

And yes, it does taste better with some golden snitches (AKA Ferrero Rochers) to snack on while you sip it. Grab your apron and let's whip up a batch.

You'll need:
- 1 Liter of Cream Soda (your choice of brand - it doesn't matter)
- 3 tbsp. of butter
- 3 tbsp. of brown sugar
- 1 cup of heavy whipping cream
- 5 Werther's Originals candies
Steps:
- In your pot, boil the cream soda
- Combine the butter + brown sugar in a microwave-safe bowl and melt the combo until the sugar has dissolved. I did mine in 30 second intervals so that it wouldn't turn in to a hot bubbly mess - stirring with a fork


- When your cream soda is completely boiling (like, really boiling, not little bubbles) mix in your butter + sugar combo with a whisk - being sure to keep stirring
- Mix in the whipping cream while still stirring
- Toss in the Werther's candies - and you guessed it, keep stirring

- Stir, stir, stir until the candies are all melted.

When the butterbeer has cooled enough to be tolerable, pour it in to a fancy (or not-so fancy - your choice) mug and curl up with a good Harry Potter book, a blanket that shows your house colors, and a handful of golden snitches.

In another post I will show you how to turn this nice warm drink (perfect for fall + winter) in to an iced latte alternative. Yummy...
Have you tried a Butterbeer recipe that was share-worthy awesome? Let us know!
Credits // Author and Photography: Kate Mark for Bambino Amore // Apron by Bambino Amore - found at Bambino Amore
STEP UP YOUR PHOTOGRAPHY GAME!
Aug 19, 2016

Hey everyone! For this business tip tutorial, I'm going to shed some light on how I take all of the product photos for our Bambino Amore website + Bambino Amore Etsy shop.
It's wicked easy now that I have a system in place, but, once upon a time it was a totally different story. Take a peek at the apron gallery on our Bambino Amore website see what I am referring to - I have totally stepped up my photography game with this new system. And yes, I still take each of our product photos in my bedroom - using a wide wall that's completely clear of furniture.
I tried every kind of white background you could think of - the wall (too bumpy + texturized), a disposable plastic table cloth (too shiny), fabric (showed every wrinkle), and finally - I hit pay dirt with a roll of sketch paper from the hobby/craft store. I tried lights of all kinds from workhorse lights to lamps all over the place. Finally, I was able to purchase some light stands with umbrellas and then I received some soft box lights for Christmas one year and all bets were off!
Here are the tools I use now:
- Four soft box lights - with four daylight bulbs each
- Two light stands with removable umbrellas - with one daylight bulb each
- Sketch Paper on the Roll
- Backdrop Stand
- Sony Cyber-shot DCS-HX200V
- Adobe Photoshop via Creative Cloud
- Super Awesome Mannequin that I got as a Christmas present
My system, step-by-step:
1. Identify the light sources in a room that you're using to take photographs in.

In my case, the overhead light casts a yellow glow and the windows cast a blueish light. Since I will be working with my soft boxes, I am going to cancel out the yellow glow by just turning off the overhead light. Easy Peasy.
2. Identify what you want the lights to actually light up.

I want to use the power of the soft boxes (they have four bulbs inside of each one) to light up the background so that I can achieve the blow-out white seamless look you find in all of our apron images. That means that I will place the lights on the sides of the mannequin, aim them at the background, and then make sure they are not lighting the mannequin because it will wash out the color of the apron - which is a no-no in product photography.
3. Light 'em up! Now you want to flip the switches on the light boxes and be prepared to be less-than-impressed because it isn't so bright and doesn't look as awesome as you think it should.

It's ok though, this is just one step and you're missing a key component - lighting the mannequin + apron. Now it's time to bring in the light stands - one on either side and light those up.

Still not quite what I'm looking for, but, in some instances this is enough light - no joke. We do need to bust out the umbrellas for this one though. They will bounce the light and spread it out over the mannequin + apron more evenly and give us the right kind of light.
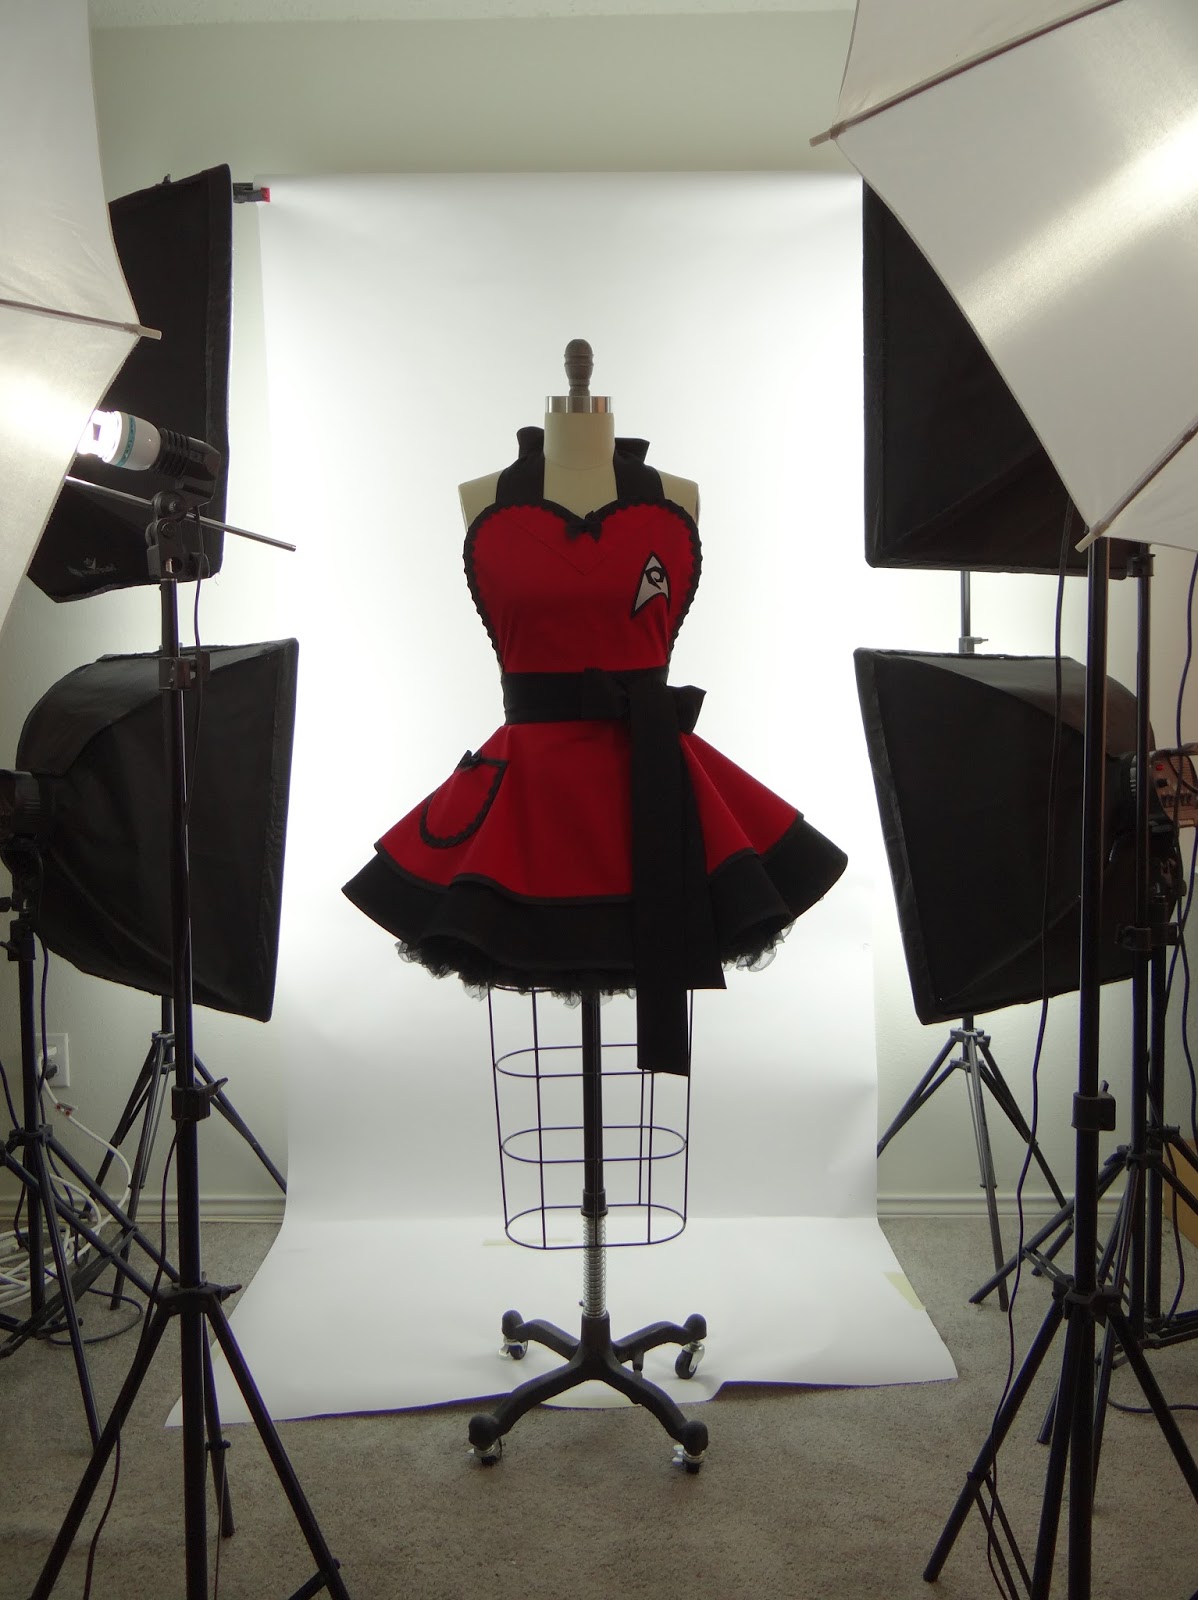
4. Snap, snap, + snap some more. The lighting is all set and all that's left is to set the white balance on your camera the way you want to, break out a tripod if you feel the need (I don't always), and begin taking photos. I tend to take about 20+ for each apron and then leave it on the mannequin while I process the photos just in case I need to take more. Don't worry about the lighting equipment being in the shots - focus on your subject.

5. Load + Edit. Almost finished! Time to see what the pictures look like so load them in to a photo editing program. I use Adobe Photoshop CC to crop, adjust curves (if it's too dark or too light), and paint (using white and a feathered paintbrush). Paint?! Yep, we have to remove that lighting somehow.
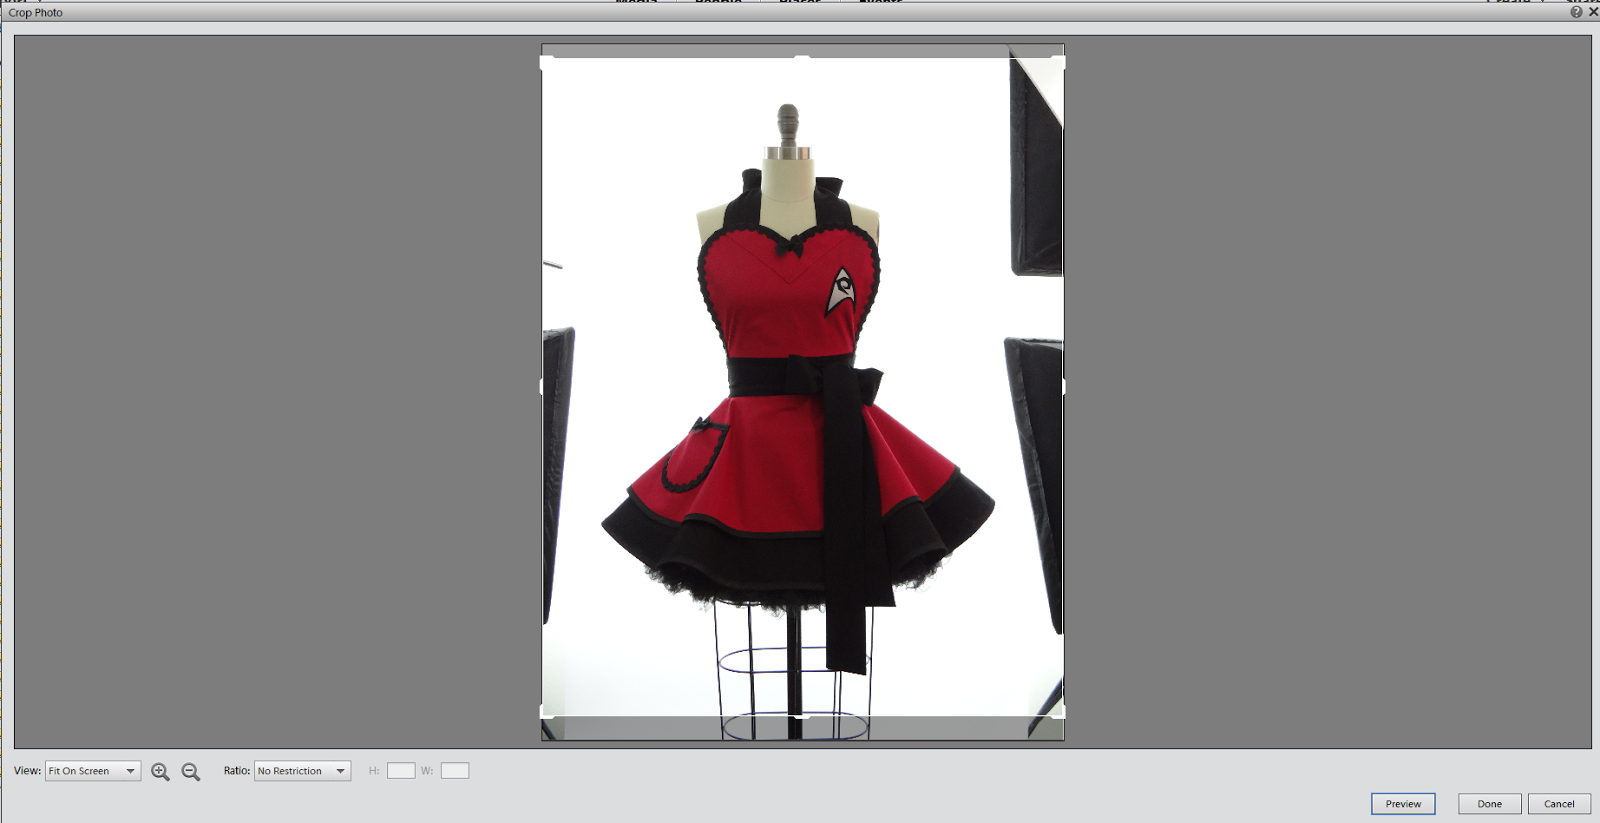
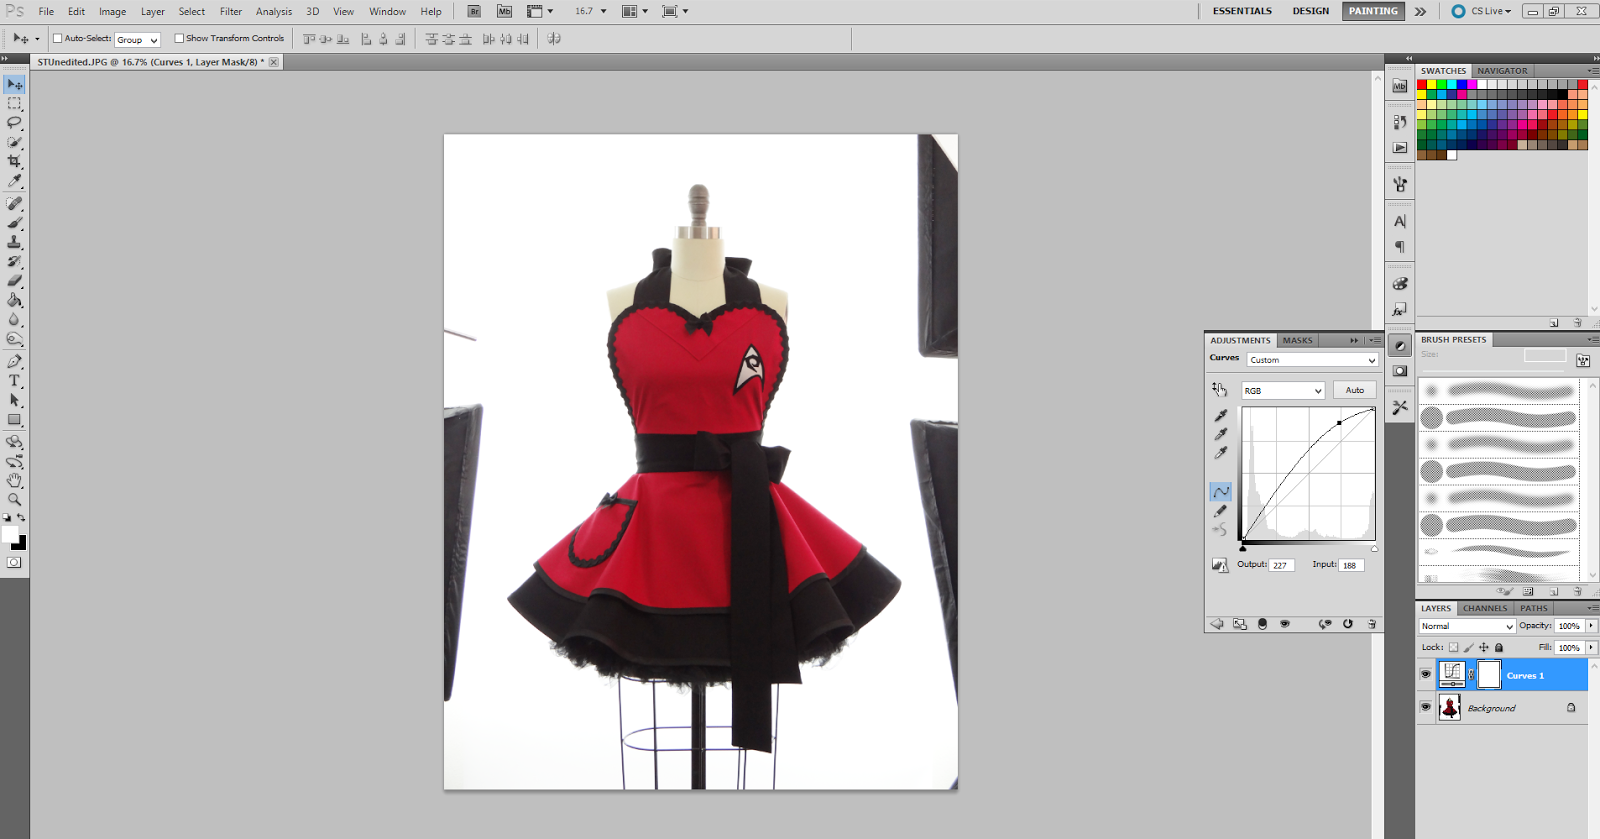

Now that we have cropped, adjusted the curves to lighten the image a bit, and painted out the lighting equipment we are all finished. The result? A fabulous image with a pure white background that looks like it belongs in a catalog or magazine - all ready for our shops!
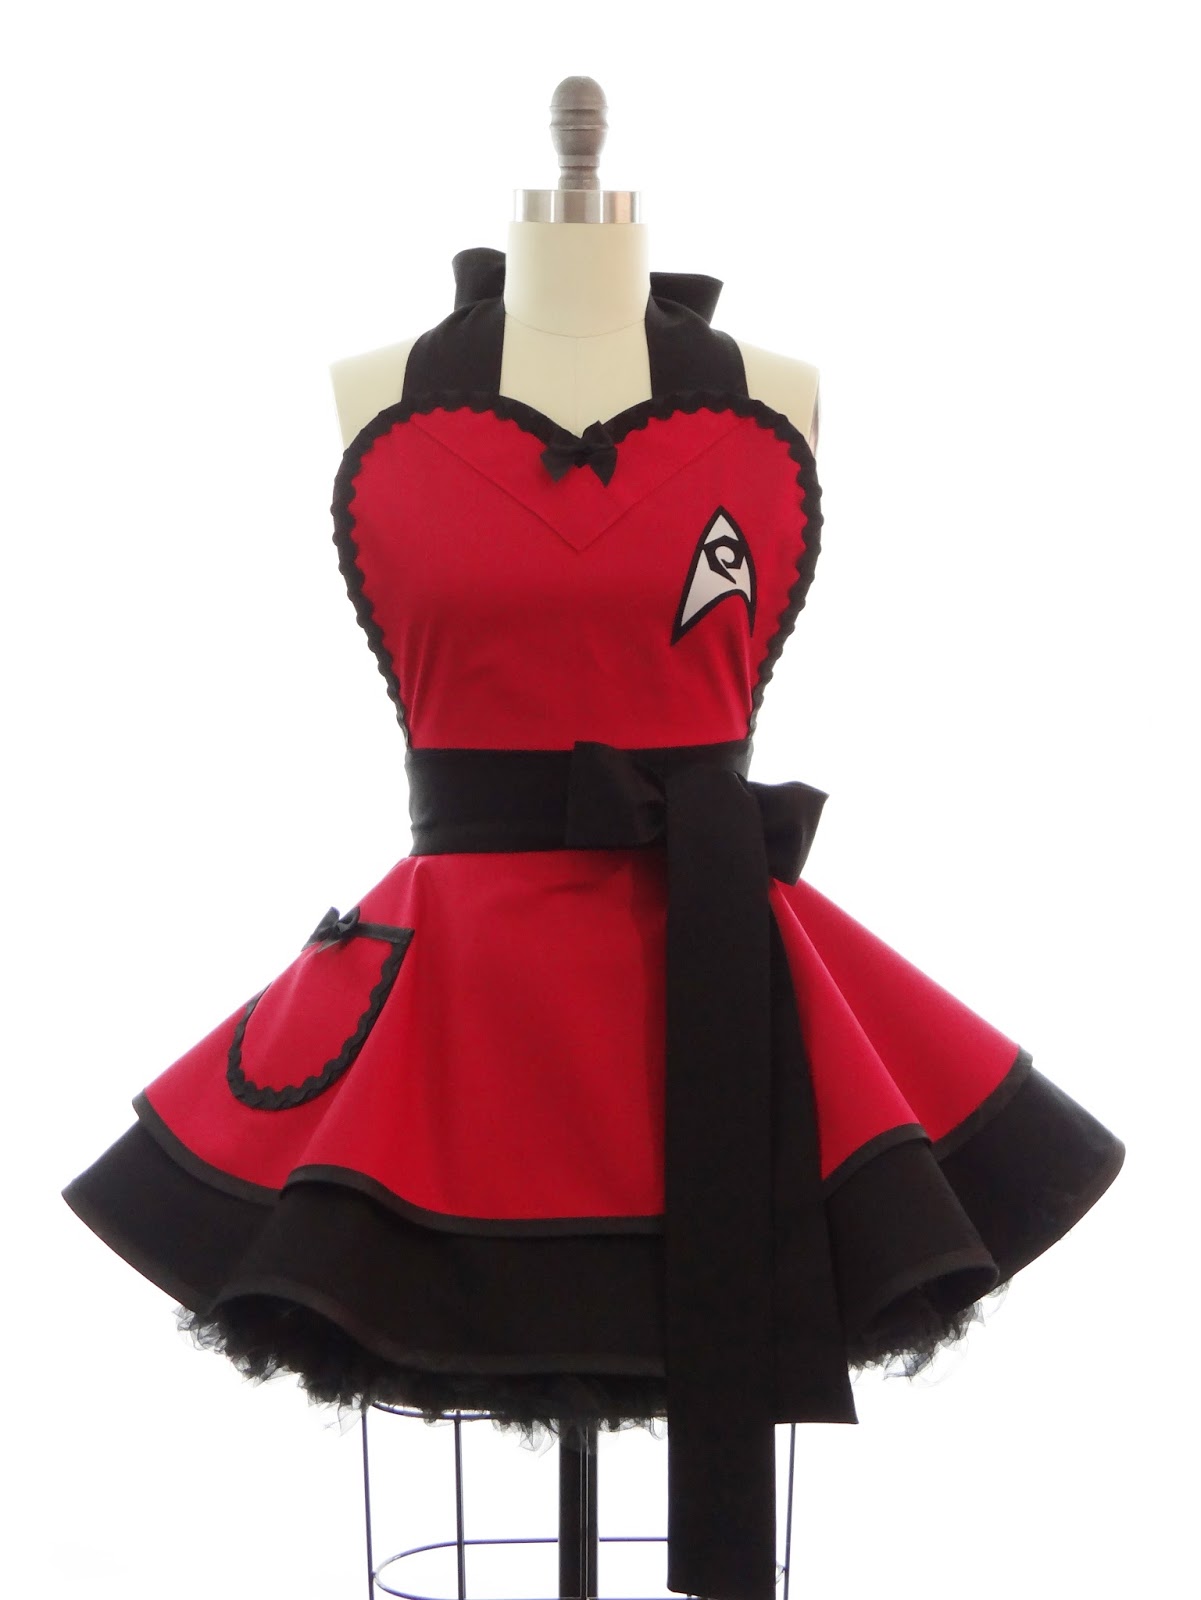
If you have any questions, leave them in the comments below. If you think this tutorial will help someone out with their product photography - tweet it, pin it, link it, post it, forward it, etc.
What products do you create yourself and take photos of on a mannequin?
Credits // Author and Photography: Kate Mark for Bambino Amore // Apron by Bambino Amore - found at Bambino Amore

Subscribe to:
Posts (Atom)


Social Icons